AccountsIQ
Integrate Bunny with AccountsIQ for seamless SaaS revenue accounting.
The AccountsIQ integration supports the following:
- Synchronize the general ledger from AccountsIQ to Bunny.
- Synchronize completed invoices from Bunny to AccountsIQ.
- Synchronize accounts related to invoices from Bunny to AccountsIQ if needed.
Configuration in AccountsIQLink to Configuration in AccountsIQ section
- Login to your AccountsIQ account. On the dashboard, click Setup.
- Click Integration Applications, then New Integration.
-
Click New Integration Application. Complete the form as following. Use your own email address in the Developer Email field.
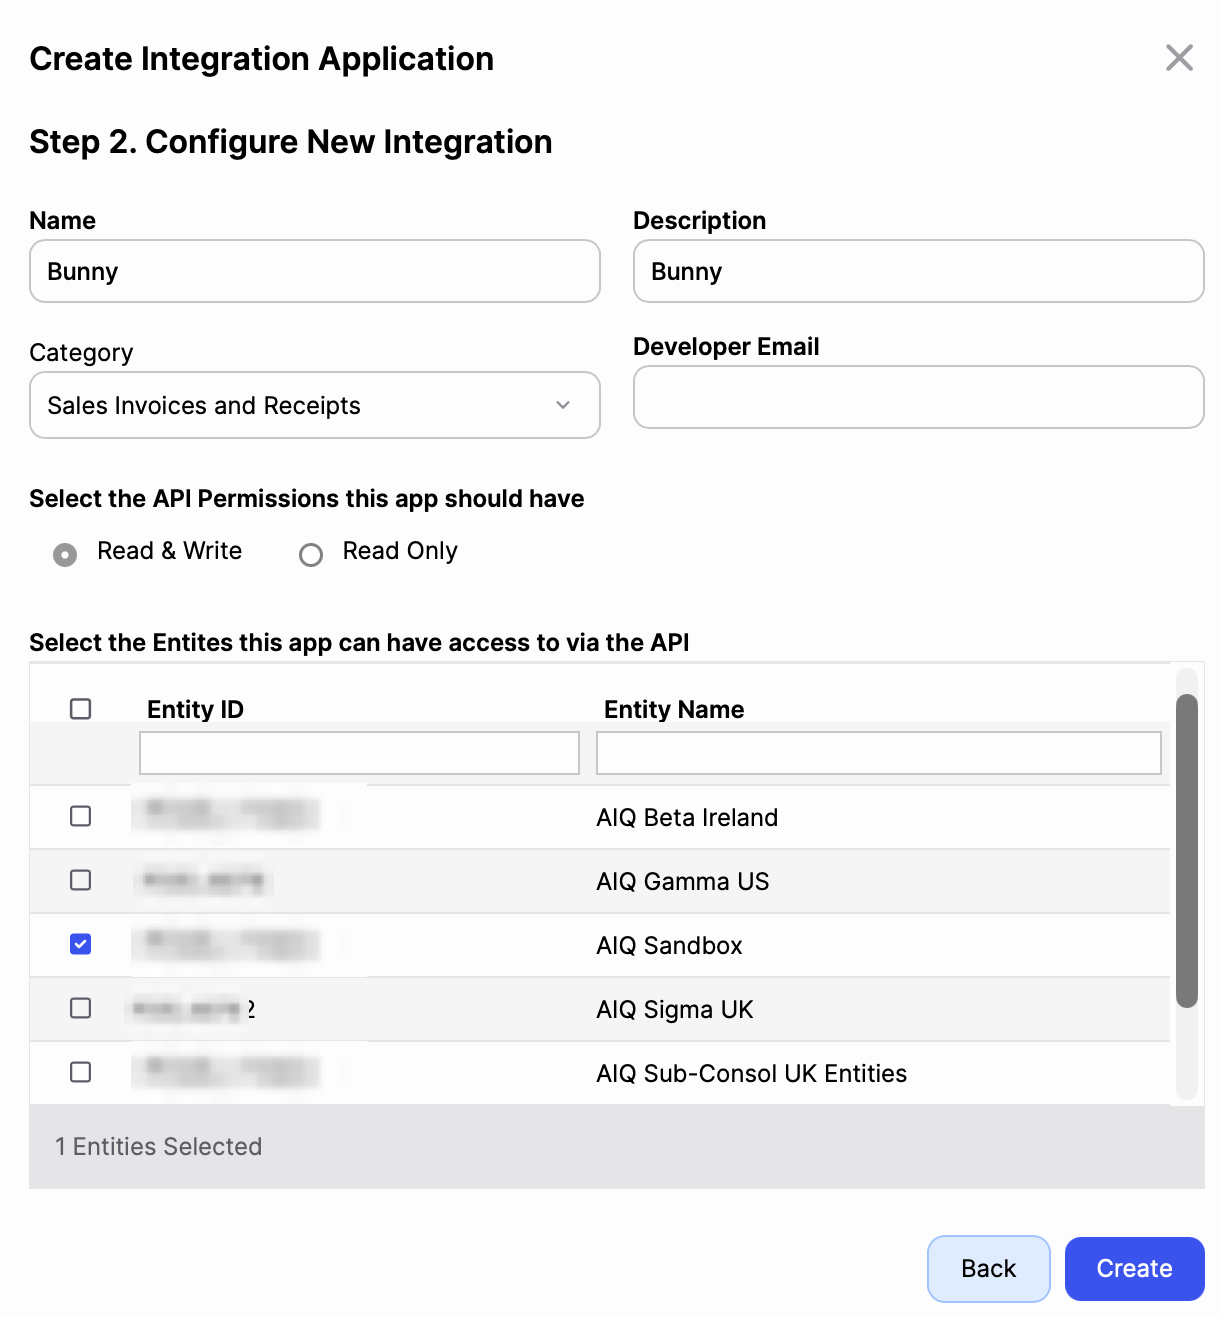
- Click Create.
-
When the integration application is created, a modal will appear. This holds the OTP code you will later need to access the developer portal. Click Copy to copy the code, then OK.
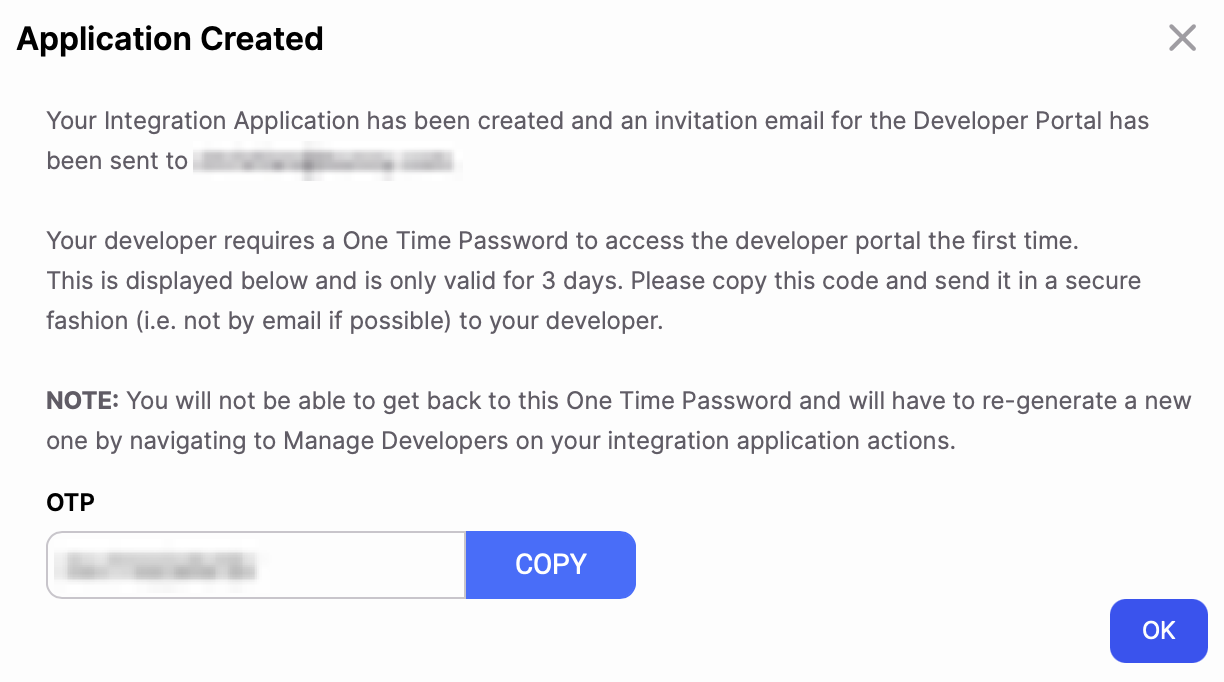
- Check your inbox. There will be an email invite to the AccountsIQ developer portal. Subject will be Developer Portal - New Application Has Been Assigned To You. Click the link in the email the access the developer portal via the OTP token.
- Click All Integration Applications.
-
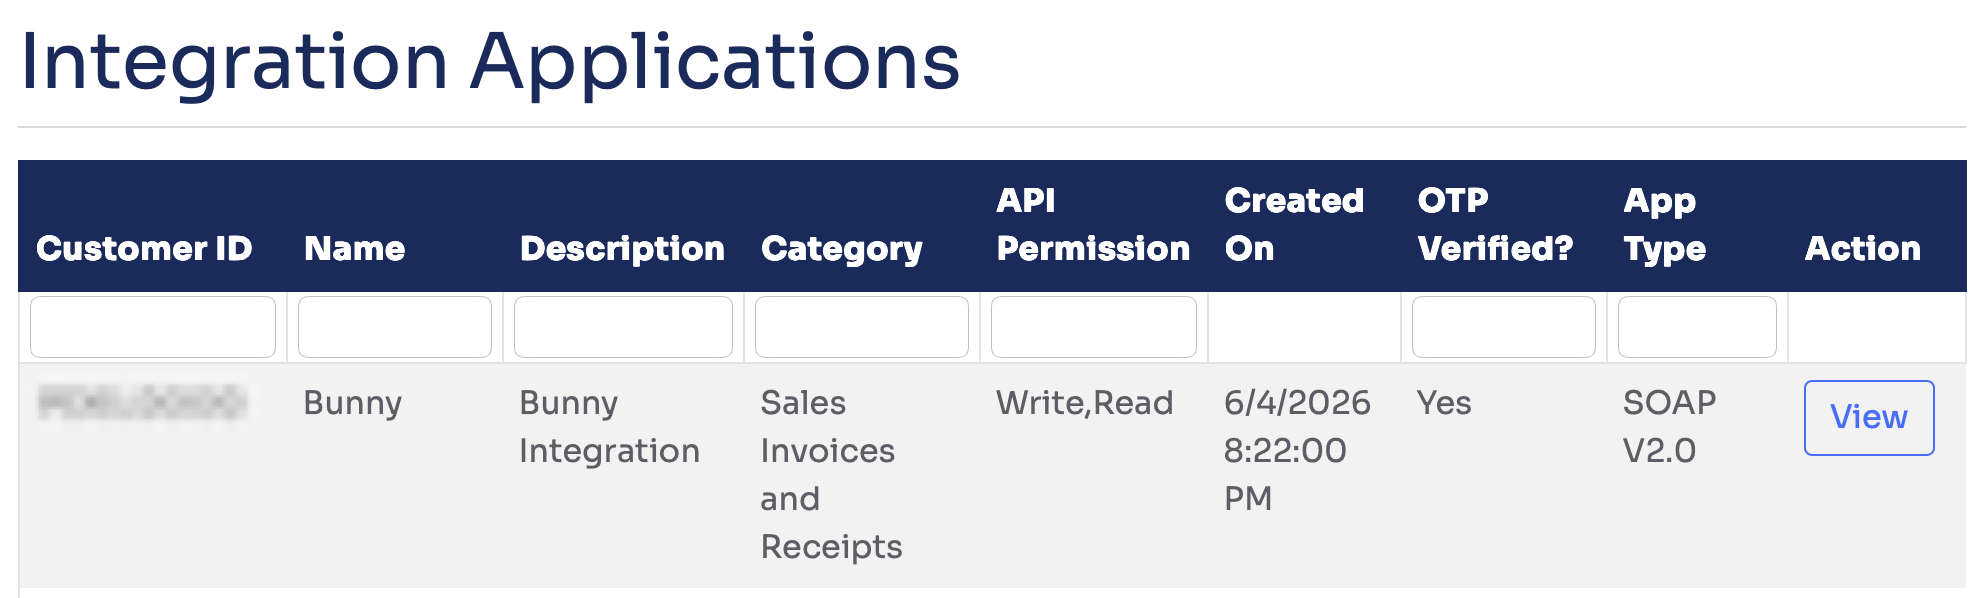
Click View next to the application created in Step 3:
-
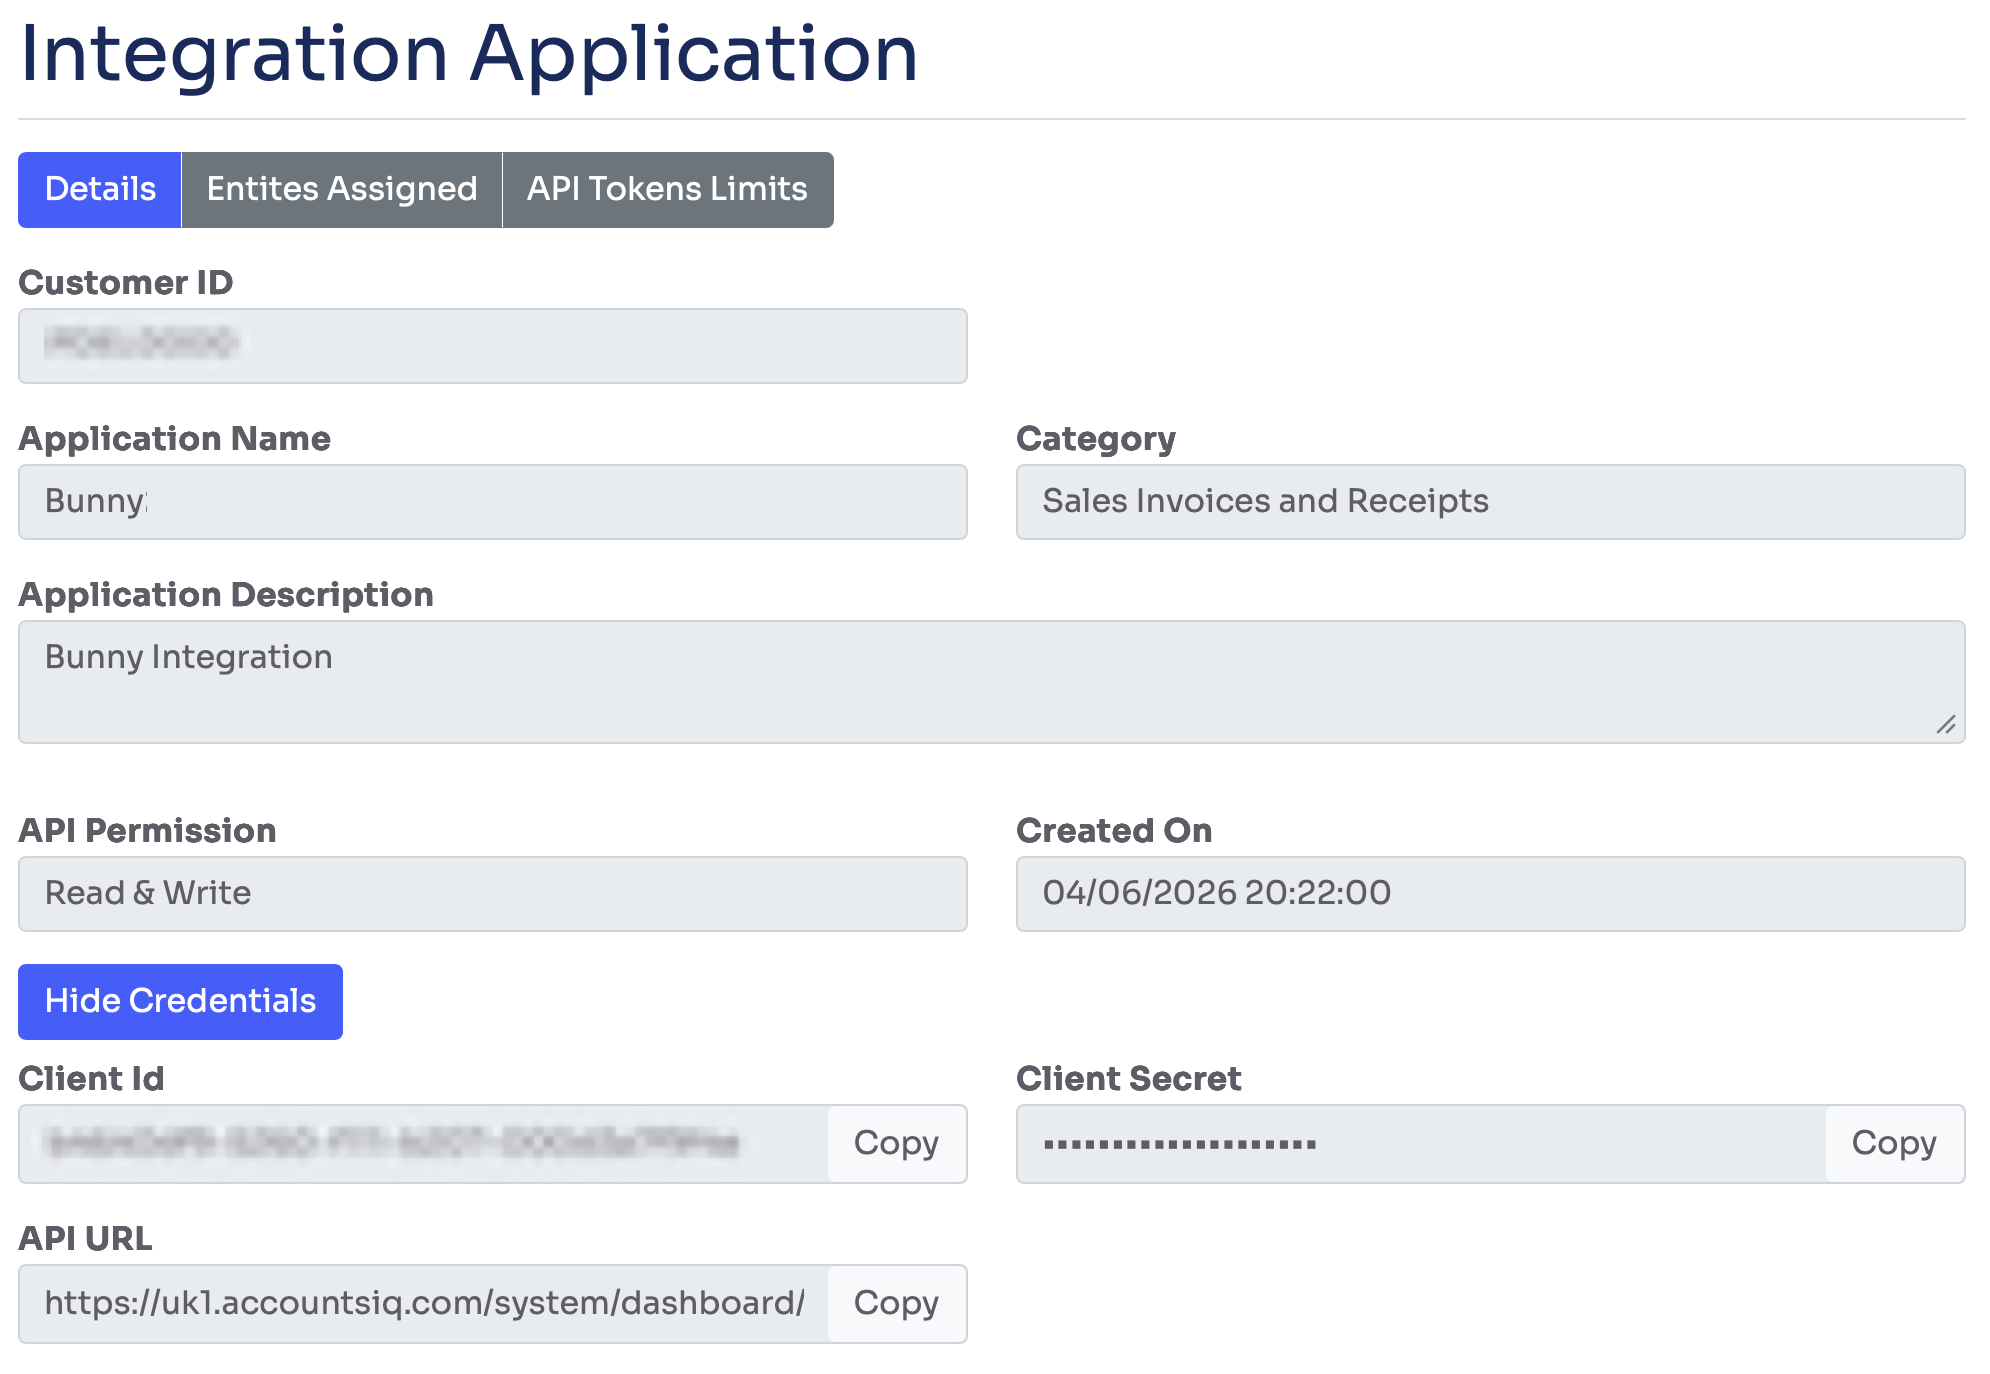
On the Integration Application detail page, copy and store the Client Id and Client Secret somewhere safe.
- Next, you’ll need a default sales tax code. Go back to the Dashboard, and select the entity you selected in the Integration Application. That will lead you to the actual AccountsIQ application interface. Click Setup, then Codes Maintenance and then under General, click Taxes. Copy the tax code that applies to your scenario, e.g. V01 for Standard Rate.
Bunny has several options for calculating sales taxes, including Kintsugi and Avalara.
Configuration in BunnyLink to Configuration in Bunny section
-
In Bunny, click Settings in the left side menu, the Integrations. Select the Available Integrations tab, and click the “Download” button on the AccountsIQ integration panel:
-
This brings up the configuration screen for the AccountsIQ integration:
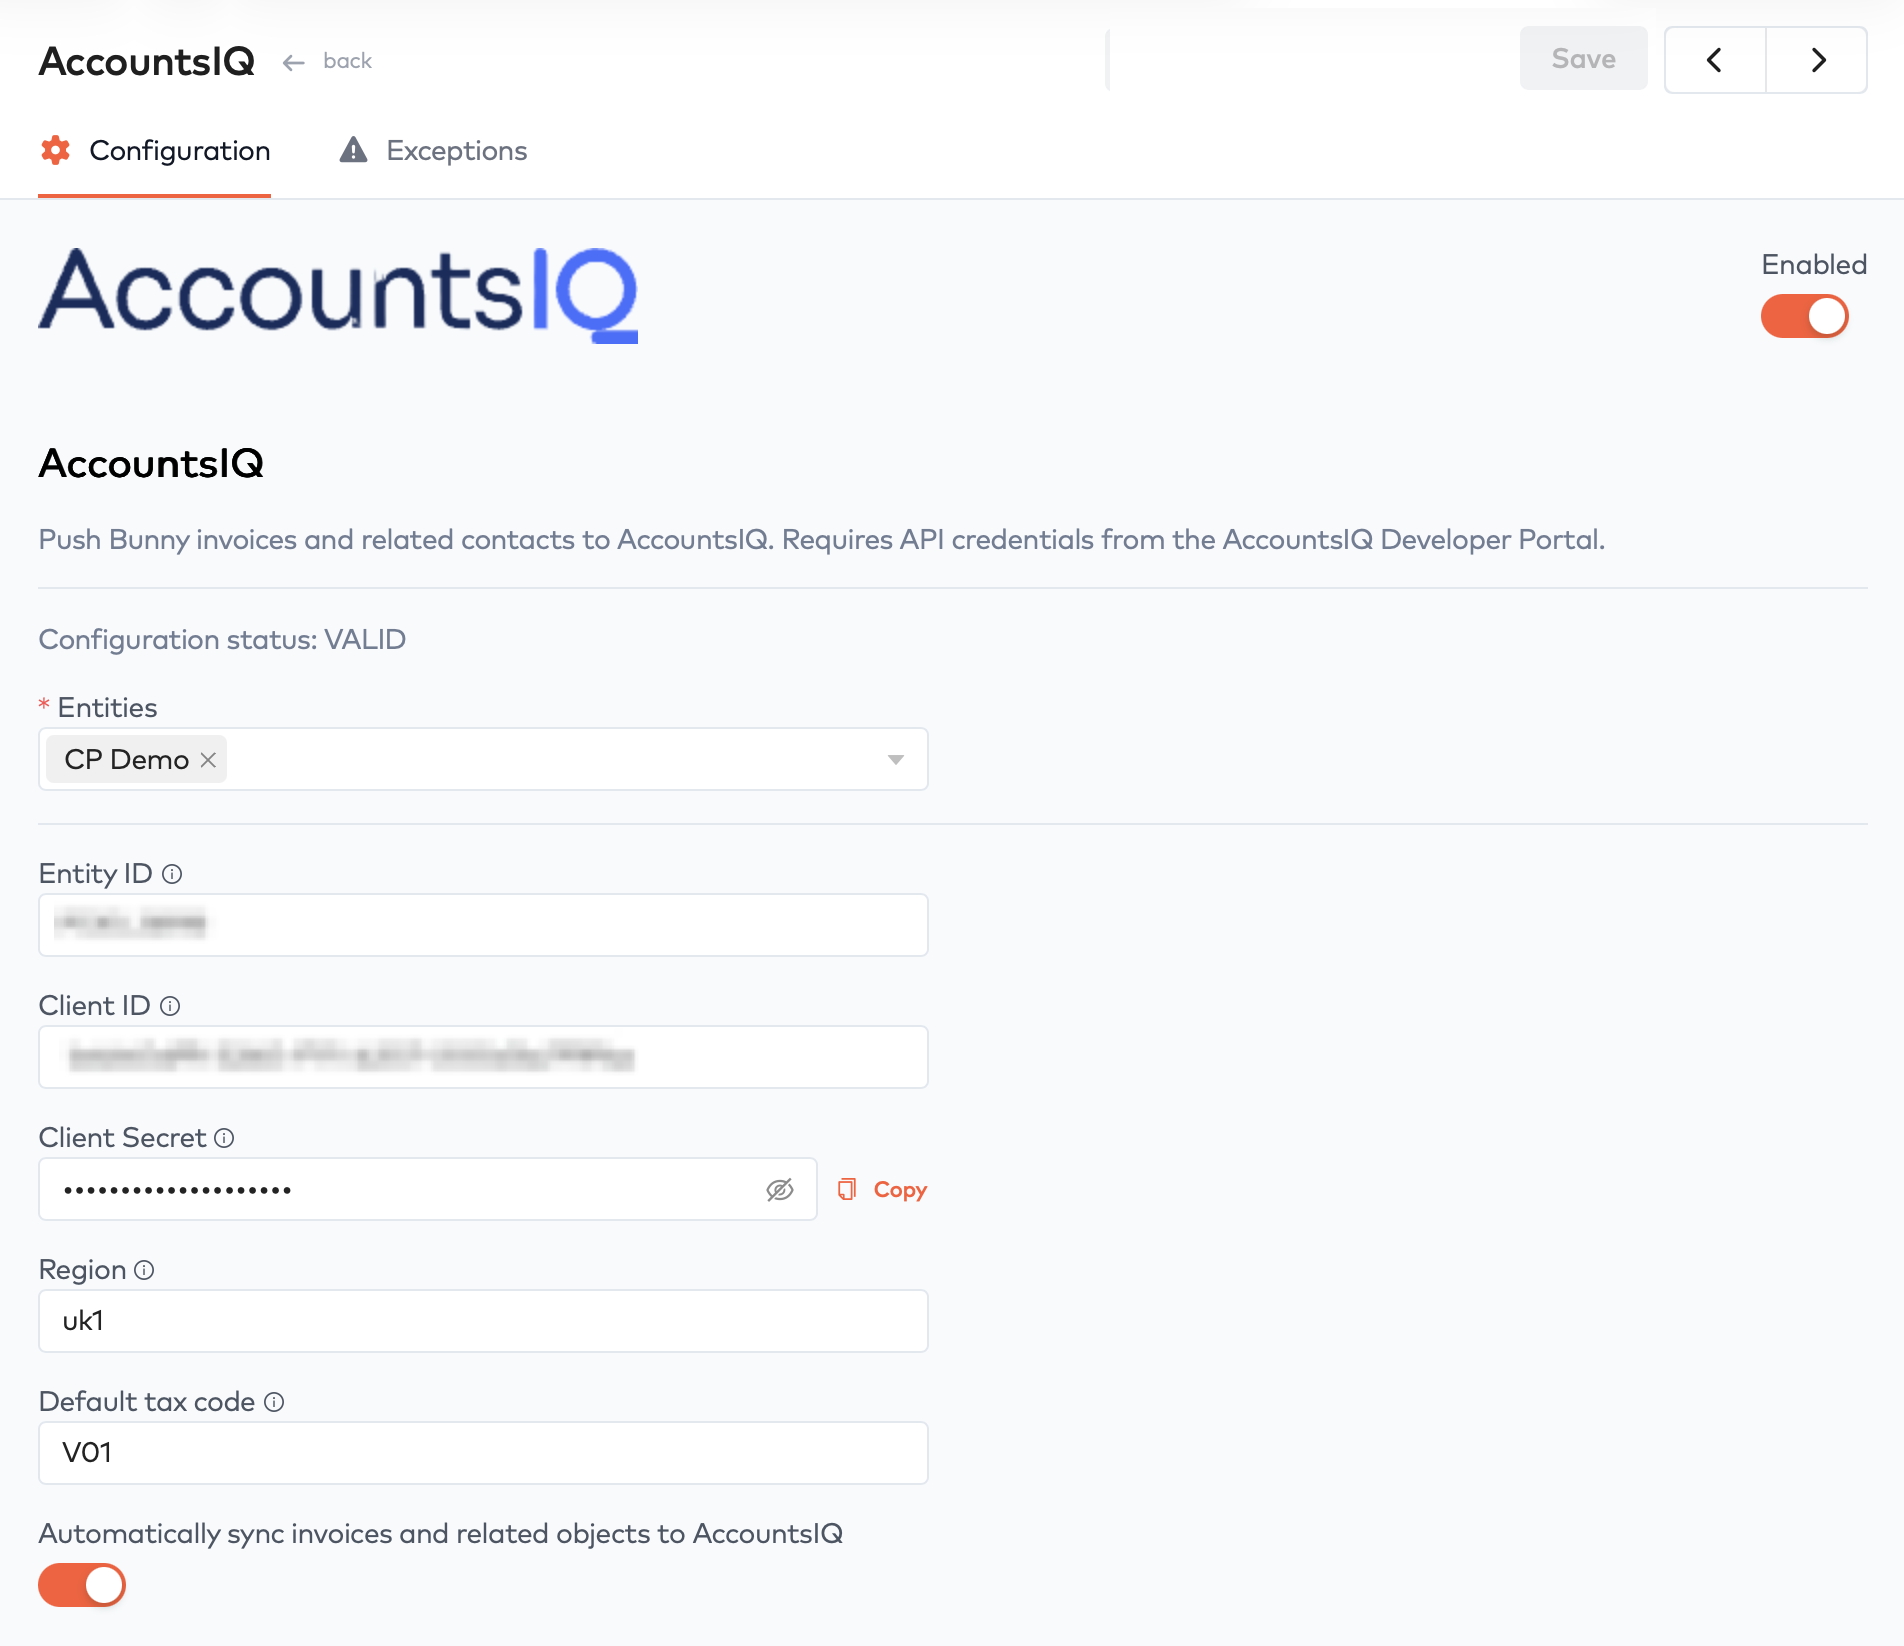
- In the Entities field, select the business entity this integration applies to. Only invoices generated within that entity will be syncrhonized to AccountsIQ.
- In the Entity ID field, insert the Entity ID from AccountsIQ where the invoices should be synchronzied to. This is the same entity as was previously selected in Step 3 in the section Configuration in AccountsIQ.
- Insert the Client ID and Client Secret that was previously copied in Step 9 in the section Configuration in AccountsIQ.
- In the Region field, type the AccountsIQ region code where your account is located. This can be one of US1, EU1, EU2 or UK1.
- In the Default tax code field, type the tax rate code that was previously picked in step 10 of the section Configuration in AccountsIQ.
Do not yet enable the option to synchronize invoices and related objects to AccountsIQ.
- Click Save. This will take a few seconds while Bunny confirms that the settings entered are correct.
- Once successfully saved, click the green button named Sync financial accounts that will appear in the top right corner. This will copy the general ledger accounts from AccountsIQ into Bunny’s financial accounts.
Financial account mappingLink to Financial account mapping section
AccountsIQ require that each invoice item is mapped to a financial account. You can either select a default financial account for revenue, or map individual financial accounts to individual price list charges. That enables your organization to post revenue from e.g. subscriptions under one financial account and e.g. professional services under a different financial account.
To configure a default financial account for revenue, do the following:
-
In Bunny, go to Billing, then click GL mappings.
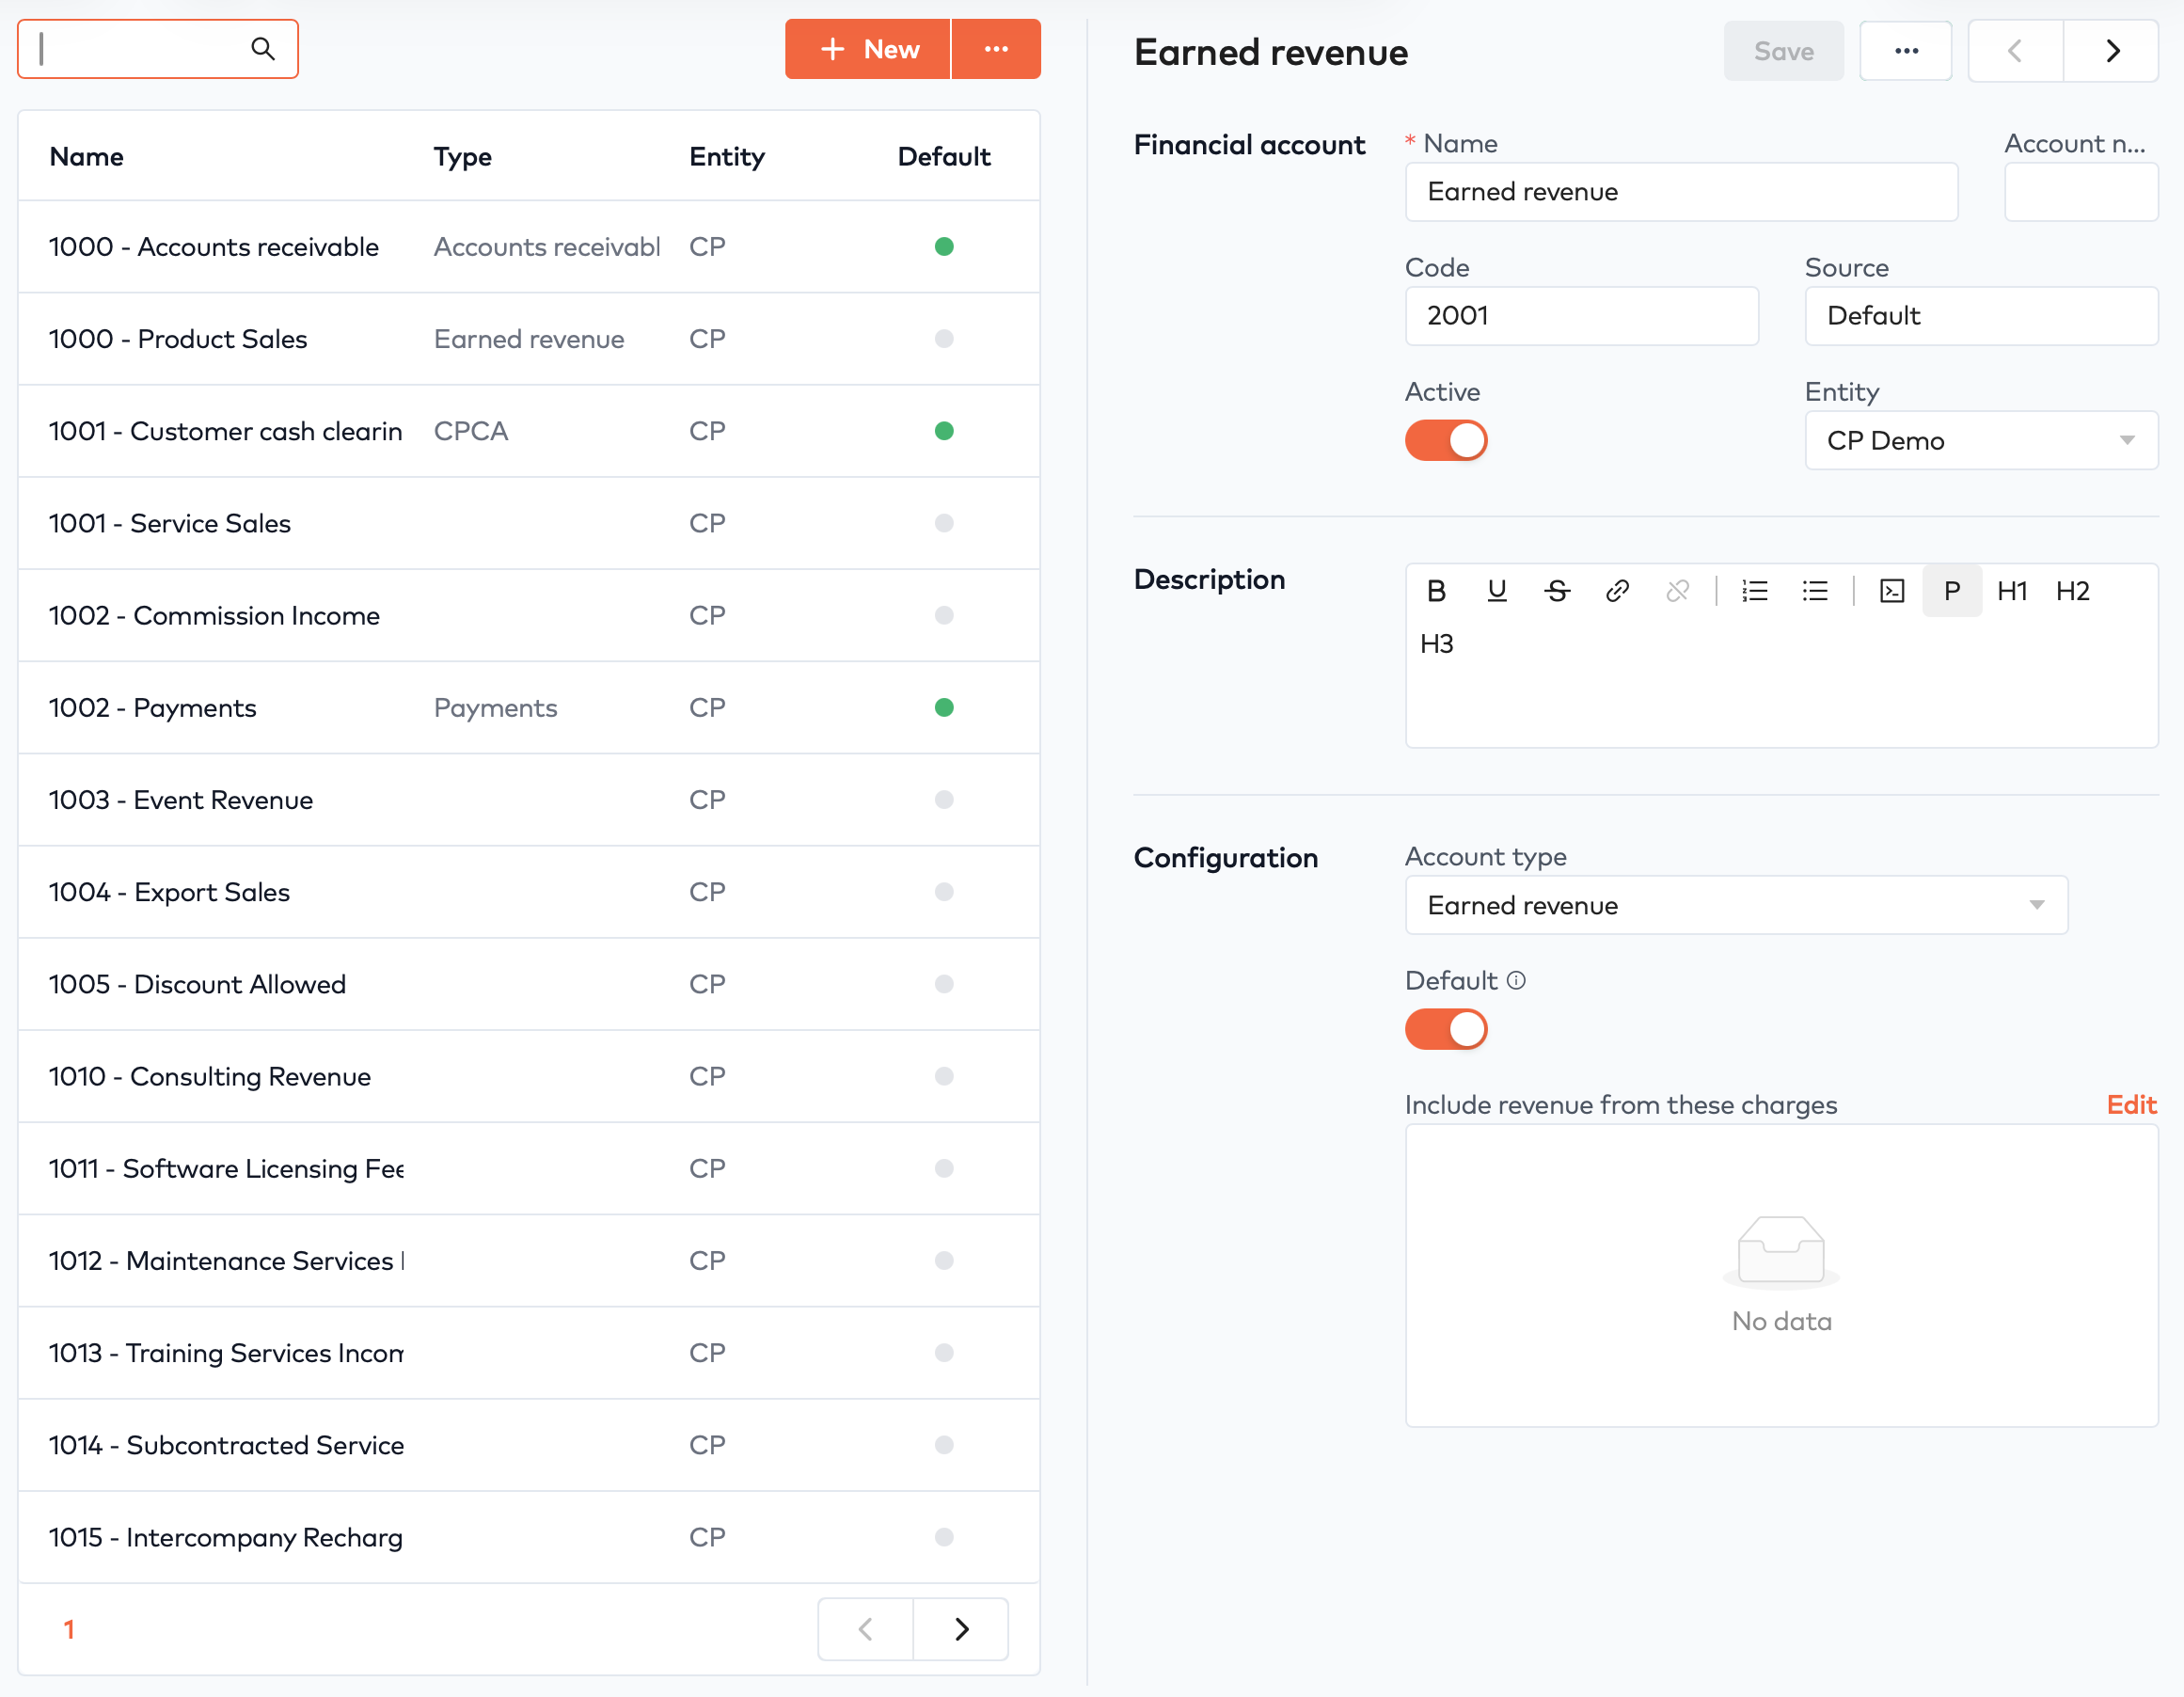
This UI shows all financial accounts in Bunny. Bunny comes with a number of default accounts, and in addition, we also imported the general ledger from AccountsIQ in a previous step. - Search for and click the financial account that should be used as the default account for charges that do not have specific financial accounts mapped to them.
- In the Configuration section, select the account type Earned revenue.
- Enable the Default setting. Alternatively, click Edit next to the Include revenue from these charges box and select the appropriate charges.
It’s important that all charges map to a financial account either via a direct mapping or a default. Otherwise AccountsIQ will reject the invoice.
- Click Save.
Enabling the integrationLink to Enabling the integration section
- In Bunny, go to Settings, then Integrations. Select the AccountsIQ integration.
- Enable Automatically sync invoices and related objects to AccountsIQ.
Any new invoice that gets generated and released will be immediately synchronized to AccountsIQ.
TroubleshootingLink to Troubleshooting section
If invoices are missing in AccountsIQ, go to the integration page and click the Exceptions tab. Any synchronization failures will show up here with the option to retry individual invoices.